Watercolour portrait of ‘Freeman’ the black retriever
From time to time when I am painting portraits I like to take the extra time to take photos to show how I paint, and how paintings develop. I wanted to show the lovely dog Freeman being painted. I have painted many paintings now for this lovely family, and two of the animal portraits have gone over to Canada too, which is very special.
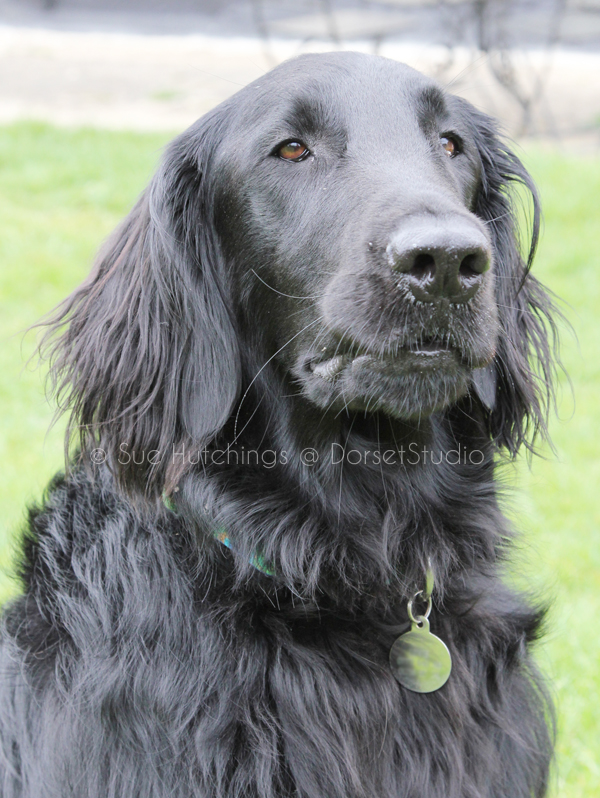
Freeman here was a very well behaved dog, and very photogenic with a lovely glossy coat which gave a lovely contrast between light and dark, and he was fond growling for his stick lol. I go through the photos at the time to confirm which one is the best angle to use with my clients, and in this case this photo was the one chose, although with a non growling mouth. I used several of the other photos to make his mouth normal.
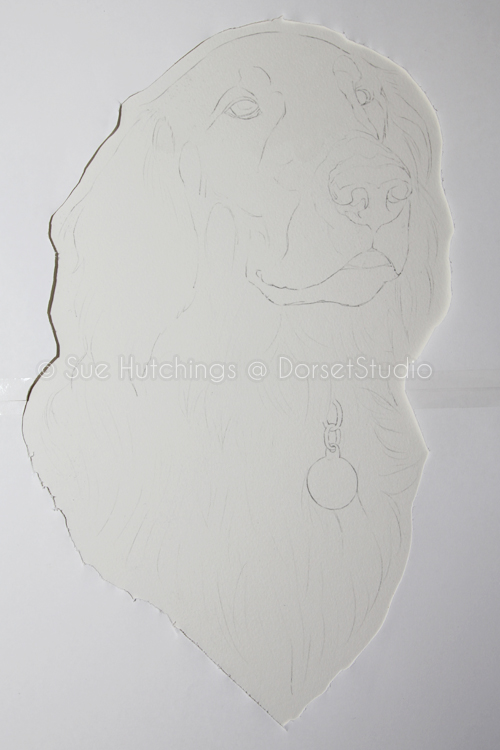
I always start a painting with a detailed drawing of my dog or cat, and include where my light and shadow areas are, and any requested alterations, in this case, the mouth chance. I then transfer this drawing onto my watercolour surface, using graphite on the back of the drawing and pressing it through carefully with pencil, but not too hard to score the underlying paper. My main reason for doing this, is that the watercolour paper surface is so delicate, that to rub out on it means that the painting suffers as a result.
Once I have pressed out my drawing, I cover the whole area with a large piece of paper and remove the area aperture to paint through. I have in my early years discovered that you only need a small blob of paint on your hand to ruin a painting you have spent an age on. It is a practical life saver to small splashes and marks that can happen while painting. I then use several pieces of paper under my hand to directly lean on to stop any grease on my hands transferring to the watercolour paper also.
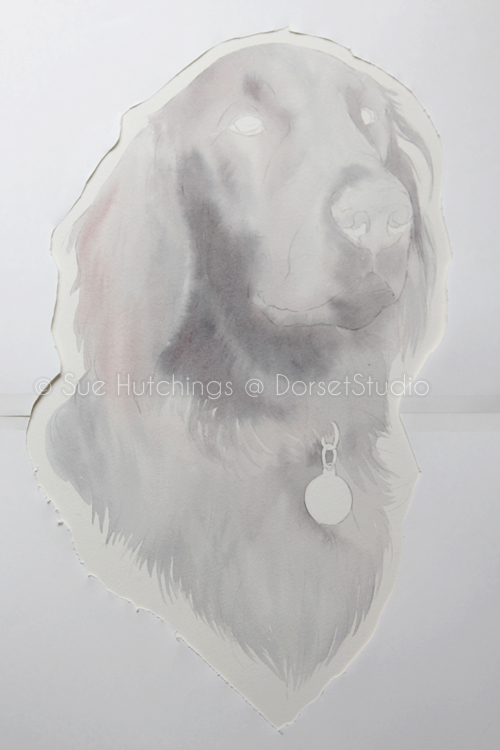
I like to begin by painting in some of the light tonal values to give me some shape, before then going onto the eyes.
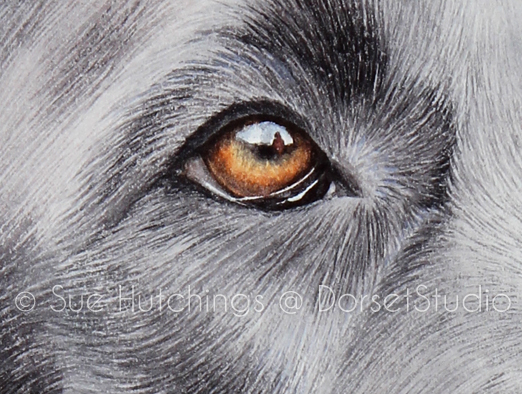
For me it is the eyes that give a painting it’s life, and I like to get those started first. I work into great detail into the eyes, and often include the owner in the reflections. See the last photo for a close up of this.
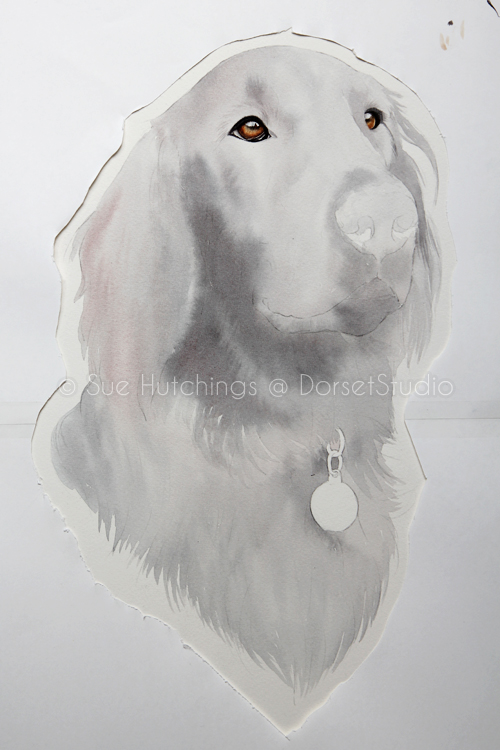
I paint as much as I feel I can to know I am happy before moving onto the detail surrounding the eyes, giving them tonal value and working in layers at building in the depth. at a later time, I go back to the eyes and complete the shadows that I need the surrounding tones to balance them with. Too much too fast can kill a painting using this medium.
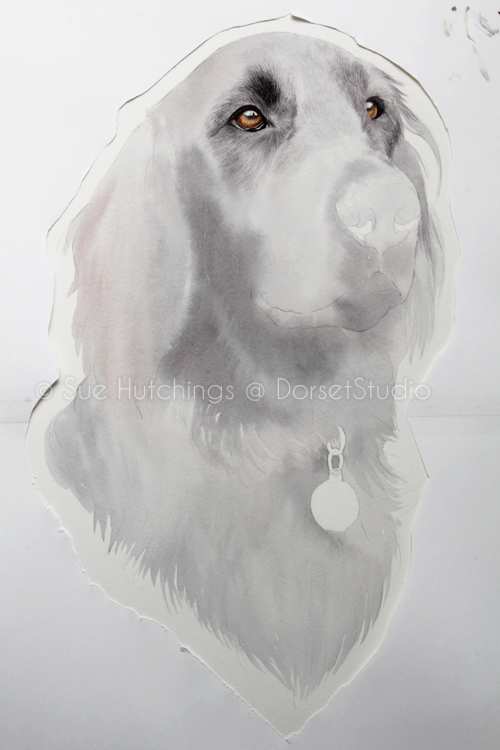
I then move to the nose, and get most of the tones in and the textures in. while painting I find it important to take lots of small breaks away from the work, so that i can keep coming back to it with ‘new eyes’. It was one of the things I remember very well from my early years, labouring lovingly on something and being so engrossed to even skip meals, only to find that something was not quiet right, and I would have to remove a great deal of the work to get back to an earlier point again, or start a new. Taking some time, especially with the starting point of the base drawing is so important, and it does pay off later.
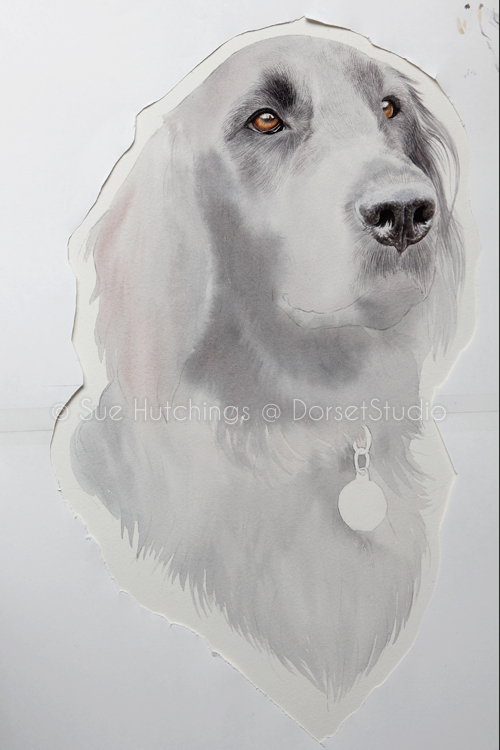
Now it is just drawing out the detail in layers and layers of thin washed, and lots of negative painting.
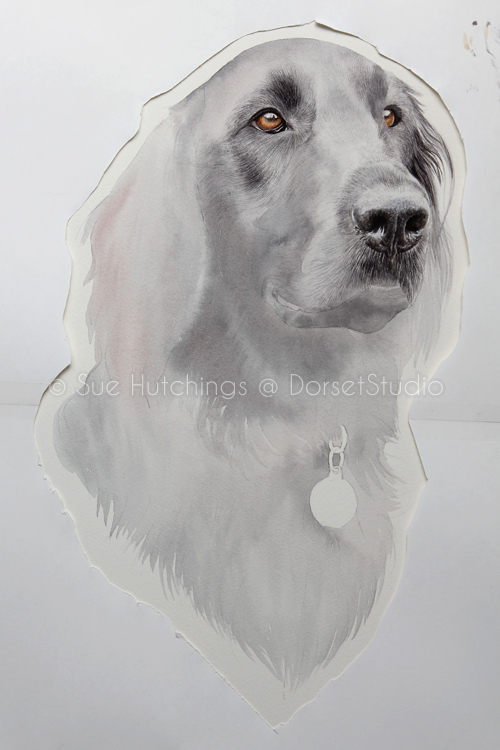
My brushes vary from a large but pointed no 12 brush for starting the paintings washes, using wet in wet techniques, to then using no 0 – 3 sable brushes, sometimes a sable/synthetic mix. My main reason for using a no 3 brush in a Pro Arte range is that it holds enough paint to complete the strokes I need especially when building up long fur strokes, especially here between the ear and mouth areas, but retains a lovely point. Some of the smaller brushes you are forever dipping into paint between strokes, and you can get broken lines which is not an effect I am after. The smoother the paper, the less line breakage you get. I like to use a not texture paper as it has a little amount of tooth and comes through on the painting.
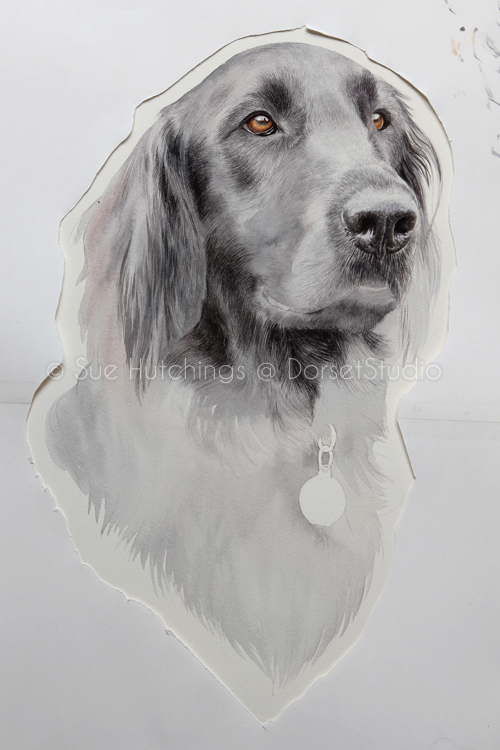
I then moved onto the mouth and downwards towards his tag. I like to leave the collars and tags till last, so that I have the right tonal values surrounding them to fill them in.
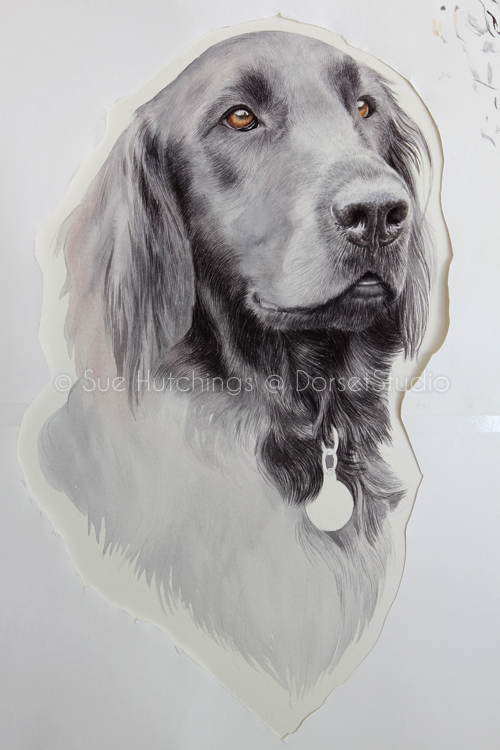
More work on the ears and more detailed layers all over add more dept, before completing the chest fur to a nice point, and then painting in the whiskers, and other small details that need to be added last
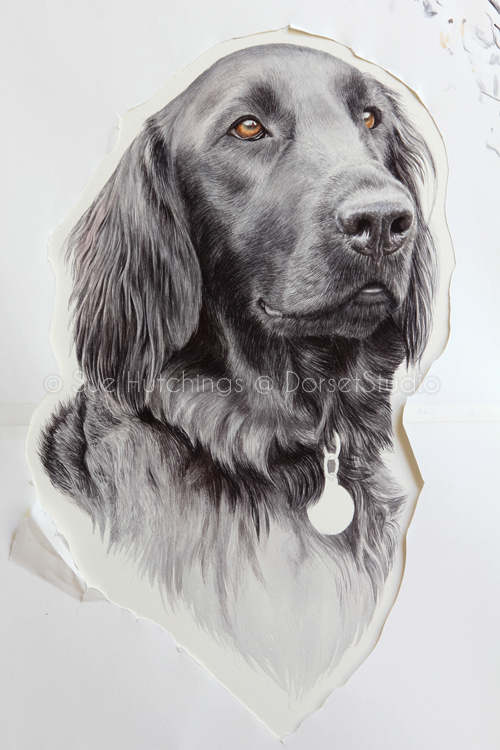
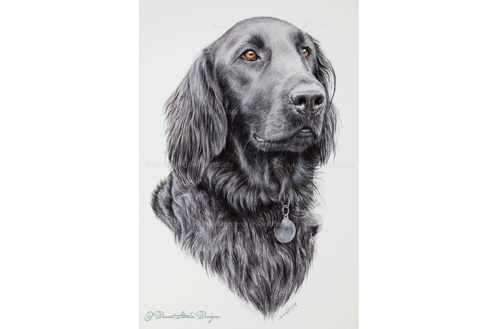
And here is the finished painting.
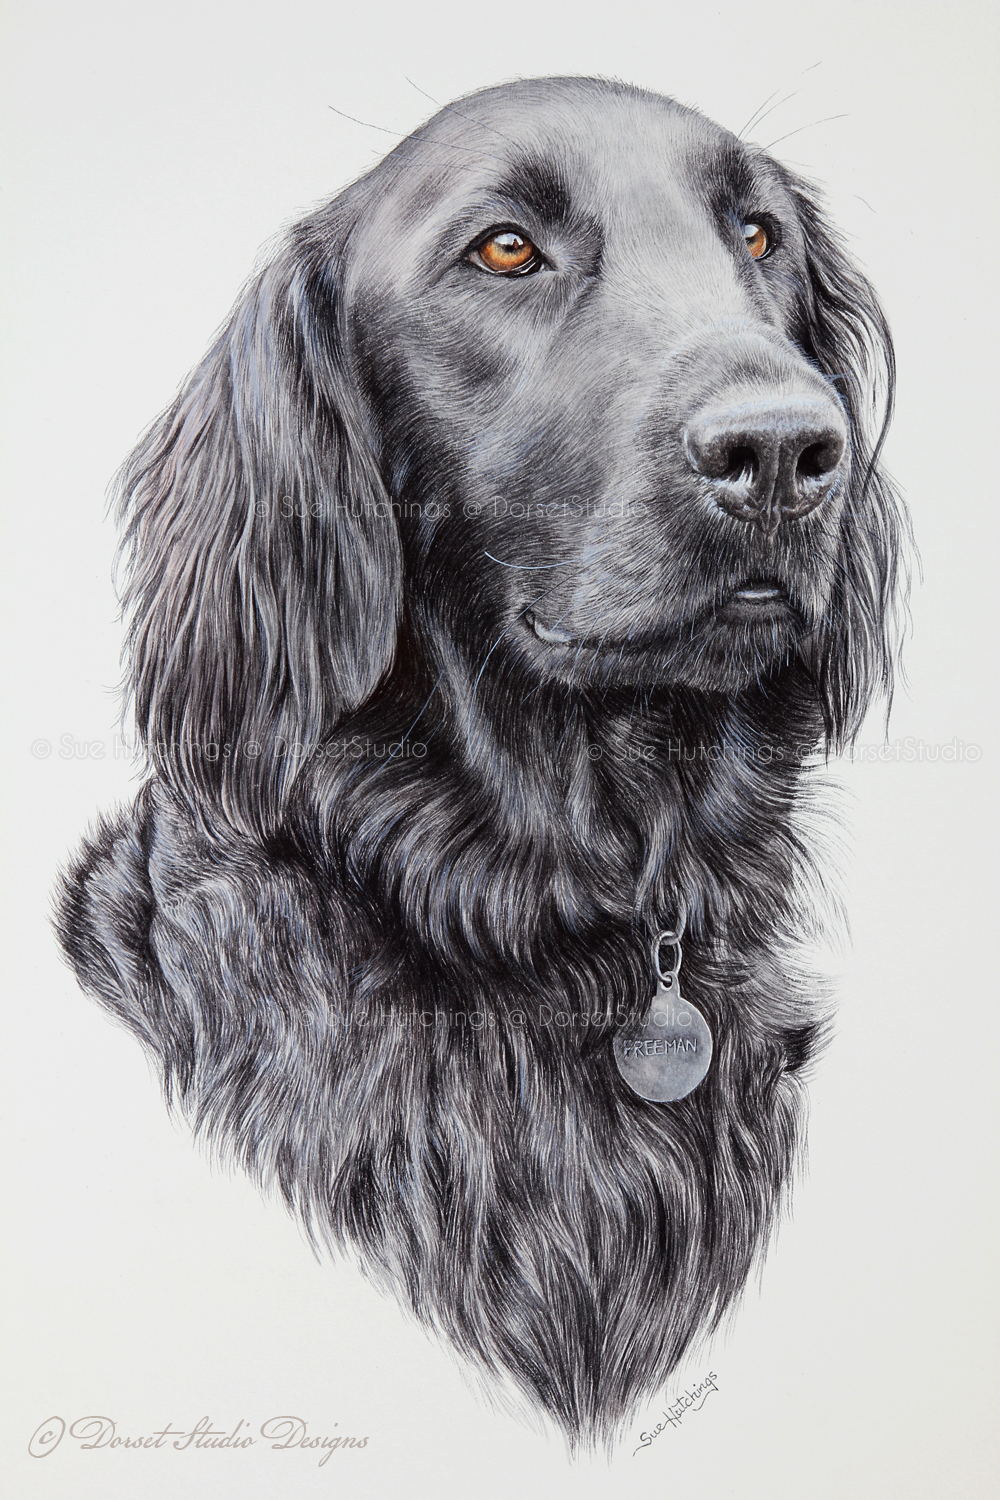
Lastly, close up of the eye detail including Tracey
Here is the testimonial that Tracey has sent me after receiving the painting:
“Well Sue did it again. This is the fourth family pet portrait we have commissioned and she has truly captured Freeman’s character and regal looks. Two portraits sit pride of place in Edmonton, Canada of my brothers feline family. The two my parents commissioned for us of our 25 year old cat, Scooby and Freeman the Flatcoat have pride of place on our wall in Dorchester. The process from photography to final art is seamless and to see how he was created on the blog is fabulous. We loved the fact that through Freeman’s eyes my image was reflected and found this a realistic and great touch. Thanks Sue we look forward to you being commissioned for Freeman’s brother or sister…”
